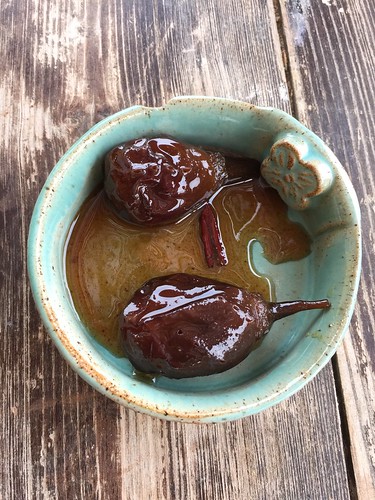
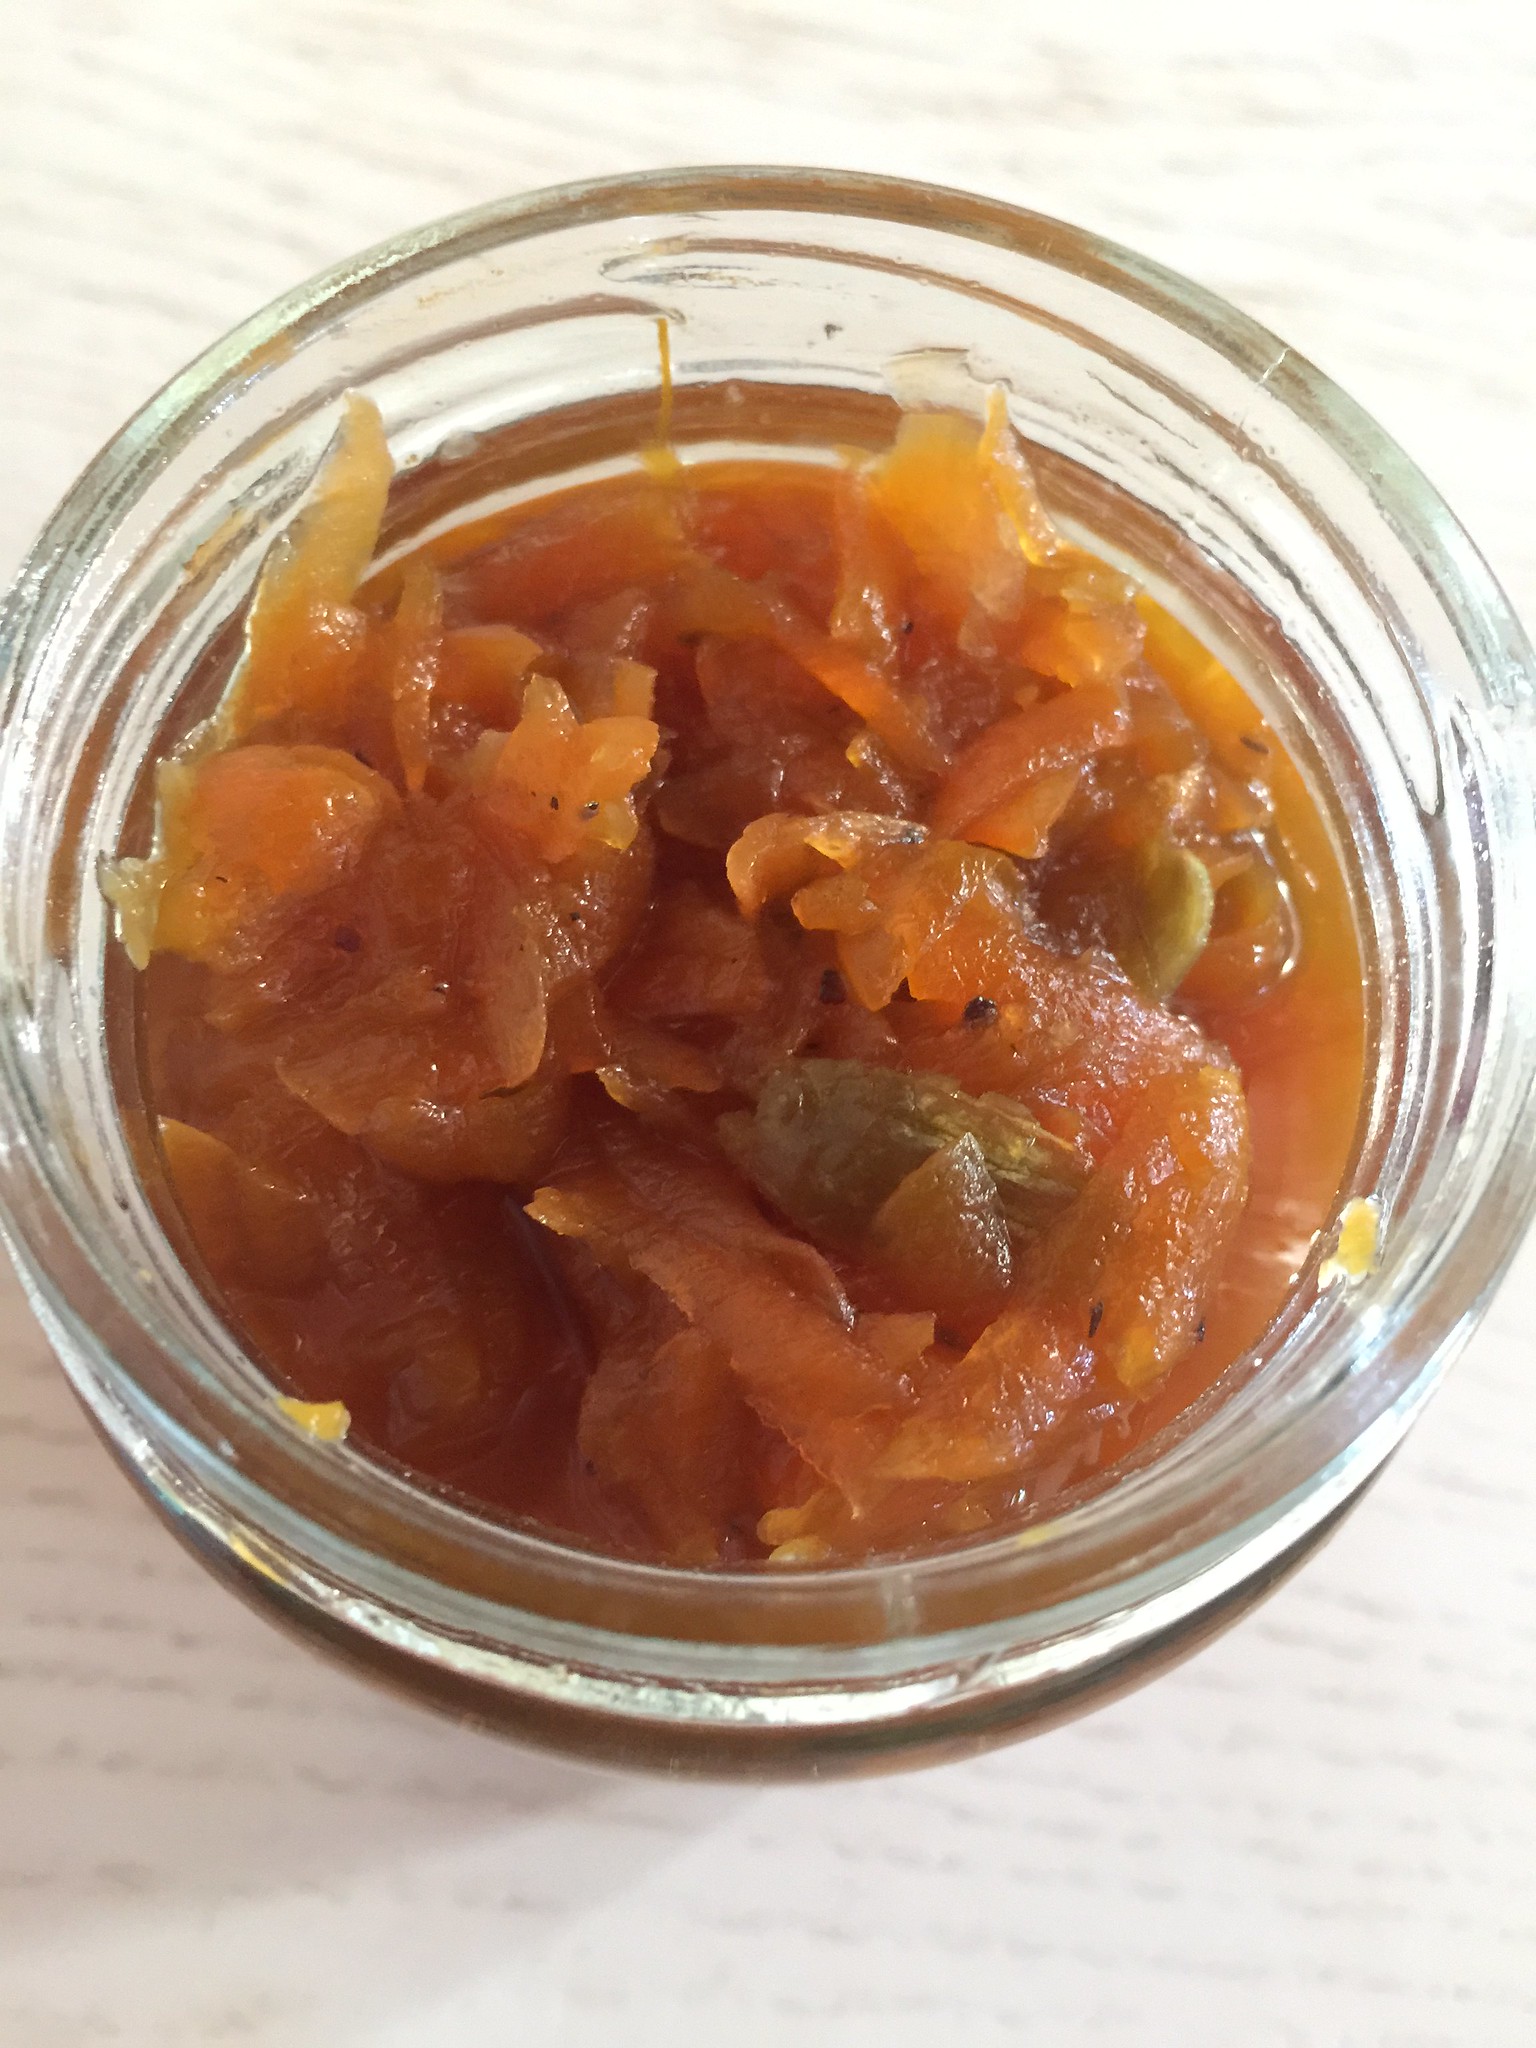
Tuesday, March 12, 2019

Persian Carrot Jam

Carrot Jam

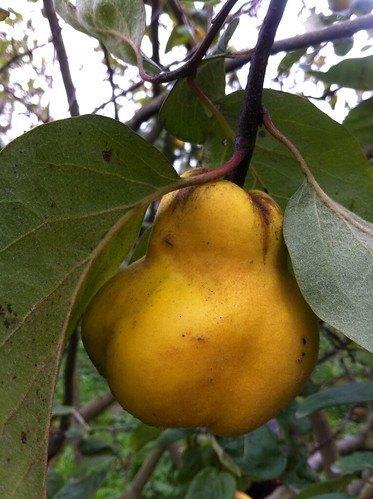
Carrot jam is a traditional Persian jam made for the holiday of Nowruz. I always like to find new recipes for using carrots - to me they are like magical golden roots, and their existence is surprising especially if you know the wild carrot (Daucus carrota), AKA Queen Anne's Lace. Although this is an impressive plant - its root is thin and colourless. How it became to be the plump orangey sweet thing that it is today is nothing short of amazing!


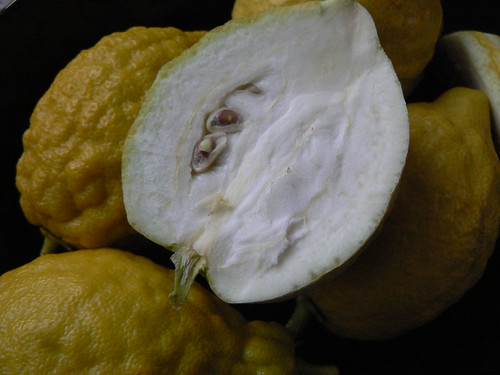
The recipe below is a spin off on Yasmin Khan's recipe from her book The Saffron Tales, with small adjustments of my own - because I can't follow a recipe straight as it is without adding my own "flavours", especially when I have wild oranges ripe on my very own tree! Also, I would advise using pectin for this jam as it is very runny and syrupy even after exceeding the cooking time. 


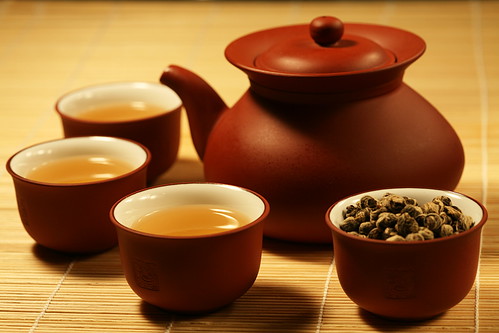
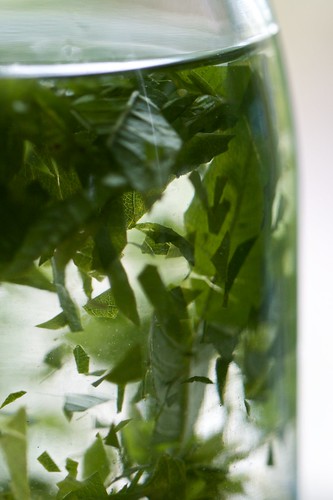
I intend to serve it at Vashti's High Tea this Thursday, an event I planned to coincide with the Vernal equinox. However, due to Purim happening that same night, we'll celebrate it a week early. It is not going to be as lavish as my tea parties in Vancouver, because Israelis don't understand half a thing about tea... To them "tea" means any bunch of herbs picked from the garden and thrown in a glass of water. Which is charming and delicious but not "tea" in the proper way as it is known in Asia and many other parts of the world that truly appreciate tea!


Nevertheless, it is going to be fun and flavourful. And most importantly - this is going to commemorate 18 years of my brand's existence. If you can't make it to the event can still enjoy an 18% off your online purchases with code Chai18 throughout the month of March. Chai is not so much for the type of tea but the word in Hebrew meaning life, and which is also the number 18, numerically speaking. If you're jewish you know exactly what I mean... If you're not then look it up


Now, let's cook some jam!

Ingredients:

500 g carrots, grated
5 green cardamom pods
A few strands of saffron
Zest of one small Seville orange (you may substitute with another citrus rind to your liking, i.e. sweet orange, blood orange, lemon or lime)
500ml water
250g granulated sugar
3 Tbs Seville orange juice
1 Tbsp rosewater
- Wash and grate the carrots (peel if they are not as fresh and the skin is bruised etc.) 
- Peel the cardamom pods. Crush the seeds in a mortar and pestle.

- Add the seeds and the cardamom shells in a medium sized pot, as well as the saffron strands and citrus zest, water and sugar.


- Bring to the boil and then turn down the heat and simmer for 10 minutes, allowing the sugar to dissolve completely and the water to reduce.
- Add the grated carrots and bring to a rolling boil. Cook for 20 minutes until the carrots are soft and the water is syrupy. 
- Meanwhile, sterilize your jam jars:  Preheat the oven to 140C/ 225F, wash the jars and lids in hot soapy water and put them in the oven for about 10 minutes. When they have dried completely remove them from the oven and leave to cool.
- Once the carrots have cooked for 20 minutes, and are completely soft,  lower the heat, add the citrus  juice and rosewater and cook for another 5 minutes or more, until the syrup has thickened a bit. Remove from the heat, transfer the jam to the sterilized jars and seal.

- Leave to cool completely, store in the fridge and eat within a month.

Labels: , , , , , , , , , , ,

Sunday, December 23, 2018

Christmas in the Middle East

Despite globalization and Santa's great commercial success (and global take over) - Christmas in the Middle East (where it originated, let me remind you) has very different vibe than in Europe and North America. That's not to say that Santa and his reindeer do not make appearances here despite the alarming lack of snow (and sometimes no rainfall either). But it looks, sounds and smells different here, nevertheless.

Last week we went to the Christmas Market in Kfar Yassif (one of the largest Christian communities north of Haifa), with full-on expectations to have my Canadian standards of Christmas markets to be blown to bits. And to my delight, they did. First there is the reckless parking culture of the villages up north (parking is always a conundrum in big events, but we survived it quite heroically), and then there is the winter atmosphere of an Arab-Christian village in wintertime: lights everywhere, little children carrying light toys they purchased at the market, and street vendors selling boiled lupin and fava beans doused with cumin and lemon-salt (Middle Eastern street food is quite healthy), and sahleb (a warm, thickened milk beverage perfumed with rosewater, mastic resin and topped with spices and nuts).

Before you get into the market, you'll have security at the entrance (because any event of large crowds, especially that of a minority group, requires security in Israel, to remind you that something bad could happen at any moment but the army and police is there to protect you). And then there was lively and upbeat music - dumbak drums on the stage were performing Baladi beats by the town's square and the largest Christmas tree, later on succeeded by other performances such as a Middle Eastern violin musician, and more. And this pre-Christmas party was going to last till at least midnight, by the way. Proceeding to the market area, an overwhelming smell of barbecue filled the air - thick smoke of charcoals grilling meats of any kind (except perhaps turkey), including shrimps skewers. There were shawarma (aka donair) and felafel booths, and I think I've spotted some ma'amouls (fragrant and buttery semolina shortbread cookies filled with dates or nuts). There was absolutely none of the "Holiday Smells" such as eggnog or hot apple cider etc.


We circumvented the very crowded lineups and that's were we found the artisan stalls (there is a lovely new carpenter/woodworker in town that sold the most adorable ornaments, carved out of olive tree, some shaped like little guitars or oud - the musical instrument, not the incense tree); charity sales, and also those selling German-style mulled wine and green and red donuts (that look like they're made of plastic so of course we didn't eat them), and even something that looked like Japanese-style octopus pancakes next to stalls of chocolate syringes for chocaholics shooting up during Midnight Mass.

And speaking of mass - religious artifacts were offered as well lots and lots of incense was burnt. I don't think I've ever been to a Christmas market in Canada where frankincense and myrrh is openly burnt in cross-bearing copper censers! And keeping up with the syringe theme, there was the customary street-perfume-vendor stall, where perfume knock-off were sold out of large vats that make them give the illusion of precious cargo. The lady at that stall was advertising her wares by squirting cheap jus out of a large syringe (that is normally used to decant her merchandize into bottles for sale).

Around that time, we figured it would be a good moment to call it a night and go home with the loot we found - a little crocheted doily made by the local employment centre for adults with special needs, a bit clear helium bubble wrapped in lights, and the cheesiest Christmasy tiered tea tray, which for two years I've managed to avoid purchasing and always regretting I didn't...

And with this we'll close, but not before I'll give you recipes for a couple of regional sweets that are unique to the region around these holidays:

Ma'amoul Cookies Recipe
Ma'amoul
Ma'amoul are stuffed shortbread cookies from unsweetened dough, stuffed with dates or slightly sweetened nut fillings. The cookies originate in Jerusalem, but are popular all over the Middle East and each region has slightly different variation on the spices and dough recipe. For example: The nut fillings are usually walnut, but in Syria, where pistachios are abundant this is also a very popular and very elegant filling. The dough may be made from either fine semolina (cream of wheat), or from flour, or a mixture of both. Of course, the semolina ones are the best! They provide a rich, nutty and interesting texture to the cookie. In the Galilee, ma'amoul cookie dough is often flavoured with malepi (black cherry kernels), which give them a peculiar, inimitable aroma that goes especially well with the date filling (which, in turn, is likely to be spiced with cinnamon and cloves rather than the  nutmeg in the recipe to follow).

The ma'amouls are shaped in multiple ways, in order to be able to differentiate between different stuffings. The shapes can also have other religious meanings, especially in the Christian communities - where this was originally an Easter pastry. The round ones are stuffed with dates, and signify the crown of thorns and Christ's suffering, and and the nut filled ma'amouls are oval-shaped, and said to symbolize Jesus' tomb.

The following recipe is adapted from May S. Bsisu's excellent book The Arab Table, p. 303-304; and some improvements based on Dokhol Safadi and Michal Waxman's book "Baladi: Four Seasons and Nazareth" (in Hebrew), p. 288-289. Naturally, I've added my own perfumey touch to the filling flavours and also my tips from many hours of rolling ma'amoul cookies with my adopted Syrian family.

Aside from the usual kitchen and baking equipment (large mixing bowl, chopping board, knife and large cookie sheets and baking paper), you'll also need one special piece of equipment, which is very easy to find in the Middle East but not so easy to come by outside of it: little metal clips that are made especially for pinching the decorations and marking the ma'amoul. Some books will also recommend specialty cookie molds. These are very pretty and make for great (and impressive) kitchen decoration, but I found them to be way more difficult to work with (the cookies get stuck in the molds).

But most importantly - this is not a task for one person. It is best to make ma'amoul (or any large amounts of hand-shaped pastries, especially stuffed ones) with company. I sometimes wonder if it's not the cooking together rather than the eating together that keeps people together.

Semolina dough: 
4 cups fine semolina from Durum wheat, or regular sized semolina (AKA cream of wheat)
1.5 cups (3 sticks, or 375g)  unsalted butter, melted 
0.25 cup orange flower water
0.25 cup rosewater
0.5 cup unbleached all-purpose wheat flour 
1 tsp freshly ground malepi (optional)

- Melt the butter and add the floral waters. 
- Stir in the semolina until a dough is formed.
- Place in the fridge overnight, in order for the semolina to absorb all the moisture. 
- The next day, mix the flour with the ground malepi (if desired). 
- Knead the semolina dough with the flour mixture
- Roll into small balls (about the size of a golf-ball) and flatten them between your index finger and thumb. Place a small but significant amount of filling (about 1tsp) and close the dough in (it will look like a money pouch where all the dough gathers, this is the place you will place on the pan. The top will get the metal clips treatment, with decorations as imaginative as yourself. 
- Bake in pre-heated oven (to 350F or 180c) for about 15min, or until slightly golden on the bottom. 
- Let the cookies cool on a wire rack. Once cooled completely, sprinkle icing sugar on top. Keep as many as you're planning to eat within 2-3 days in a jar, so they don't turn stale. The rest are best to keep frozen. They will taste fresh once thawed again. 

Date filling:
1lb pitted and mashed dates (see note below)
1.5 Tbs unsalted butter
 1Tbs rosewater
1/4tsp grated nutmeg
* If you can't find pre-mashed dates, finely chop Barhi dates - the ones that are sold in small carton boxes and often mistakenly referred to as "fresh dates" in Persian and other Middle Eastern shops). If using pre-mashed dates (in vacuums package) be sure to remove any calyx or stem or occasional pit that were left behind).

Walnut filling:
2 cups walnuts
2 Tbs sugar
2 Tbs unsalted butter, melted
1 Tbs orange flower water
1 tsp cinnamon, ground 

Pistachio & Orange Blossom (Ma'amoul filling)

Pistachio filling:
0.75 cups raw pistachios (unshelled)
2 Tbs sugar
2 Tbs unsalted butter, melted
1 Tbs orange flower water
0.5 tsp cardamom, freshly ground 

Stay tuned for additional Middle Eastern Christmas specialty from my region, including Pumpkin Jam!

Labels: , , , , , , , , , , , , , , , ,

Thursday, October 25, 2018

Pumpkakes

IMG_2138

I received a beautiful chunk of pumpkin from my sister in law's garden (she lives next door and of course grows everything organic). It was enough to make 3 pumpkin pie filling, and then another excess of an extra half a cup. So I decided to freeze enough for making "only" 2 pumpkin pies. From the remaining pumpkin puree, I created this yummy breakfast pancakes today. Try to say "Pumpkin pancakes" and you'll quickly realize that's a pretty difficult thing to do. So I decided to just call them pumpkakes!
Mix well:
2 cups (about 600gr) cooked pumpkin puree 
1/3 cup yoghurt, buttermilk or sour cream
1 Tbs Grapeseed oil (or other neutral vegetable oil)
2 eggs
3 heaping Tbs of coconut palm sugar (or brown sugar)
1 tsp Cinnamon, ground 
1/2 tsp dried Ginger, ground 
1/2 tsp Allspice 
Pinch of nutmeg
Sift together:
1 cup whole grain spelt or wheat flour 
1 tsp baking powder 
Pinch of salt 
Butter, ghee or oil for frying
Add flour mixture to the pumpkin mixture. Fry one table spoon pancakes on a hot and buttered girdle until the rims of the pancake are a bit dry, and only then flip (this is a pretty soft.
Serve with date molasses, maple syrup or honey and various orange fruits such as mango, persimmon or sliced oranges.

Labels: , , ,

Sunday, September 23, 2018

Guava Jam

Made another batch of #organic #guava #jam with my SIL yesterday.

There are two types of people: Those who love guavas with passion, and those who can't even stand being in the same room with it. With its strong aroma, it may not be too surprising that it is related to myrtle. I've been having hard time finding innovative recipes for it. But they're out there, and also inside my head. Adding guava juice, pulp or nectar to smoothies is a no brainer (try it with coconut milk, banana and mango; but avoid orange juice as it will make it taste like orange toothpaste! I sweat!), chutney, fresh salsa (that is so easy that doesn't even require a recipe!), and inside a curry. 

Recipes I've been dreaming of are guava sorbet and/or gelato, guava creme brûlée, guava cheesecake, to name a few. Guava jam is our family tradition each fall, because no matter how much we eat it, there are always some fruit that don't get snatched in time and taste too mushy or stale and can only be salvaged if turned into jam. 

Like quince, it will become pink-orange with cooking. It's quite astounding how much fall fruit have in common: strong personalities, strong aromas, interesting textures. And just like quince, it is easily candied into a jelly-like confection (look for it in Mexican stores, sometimes it comes in a roll). 

I like to make my jams on the less-sweet side, so ration of 1:2 sugar to fruit. i..e: One kilo of guavas to 500g of sugar. Squeeze some lemon juice over the fruit, add the sugar, and add a couple of cinnamon sticks and between 5-10 cardamom pods. Clove buds are also an option (I leave them out because they can overpower easily). Another seasoning direction which is entirely different is add a couple of small, dried chilli peppers to the jam. 
Cook over medium-high heat while stirring constantly, until the sugar dissolves completely. This could take about 10-15 minutes. Don't rush it by increasing the heat as to avoid any unnecessary scorching.  
Once the sugar is completely dissolved, reduce the heat to low and cook while stirring frequently with a spoon, until a spoon that is dipped into the jam is covered and remains covered. This would take about an hour. 
Sterilize your jars and fill them while the jam is still hot. Use a hot-bath method if you're really serious about your jamming and are planning to sell or give away or made a big batch. Mine usually gets eaten pretty much right away so I'm not the most diligent sterilizer beyond rinsing them with boiling water and filling and covering right away, turning the jar upside down to create a vacuum-like seal. Which gets popped up within less than a week and eaten in about as fast... 

Homemade #guava #jam

Labels: , , ,

Sunday, September 09, 2018

Traditional Honey Cake

Great Grandma's Honey Cake

When visiting my dad in Montreal I overheard him and a friend talk about his two wonderful family recipes for honey cake. Not having been raised with my father, and knowing very little about his side of the family - I couldn't pass on the opportunity to connect to my paternal ancenstors via culinary traditions. One of them was from a friend of my grandma and seems a bit too tricky to make. The other, which I'm sharing here, seems very authentic and has even more honey than my Savta Ruthie's recipe which I grew up on.

It is very moist, and having less spices (and no cloves at all - fathom that!) it has a definitive honey flavour, which is a good thing. Honey is a strong flavour when added to more delicate things; but can easily get lost in a recipe such as cakes and cookies. It has very little oil, and is immensely moist and with a long shelf life. It is wonderful accompaniment to either tea or coffee. And also makes a very big cake, that you can cut into squares and share with family and friends as a gift - simply wrap in a wax paper and tie with a bow.

The cake has a bit of an unusual mixing method, so pay attention to the instructions:

Preheat oven to 350F/180c

Mix together ("Honey")
3 eggs, beaten
1 cup suagr
3 Tbs vegetable oil 
1 lb honey, liquid (place in hot bath prior if it has already crystallized) 

Mix together ("Tea"):
1 cup dark tea, cooled + 1 tsp baking soda

Sift or mix dry ingredients:
3 cups flour
1/4 tsp salt
2 tsp baking powder
2 tsp allspice, ground
1/2 tsp cinnamon, ground

Additives:
1/2 cup nuts (such as pecans, walnuts or sliced/slivered almonds)
1/2 cup raising or dates, dusted with some flour first (if you don't do that they will sink to the bottom of the pan and burn or caramelize at best) 

Juice of 1 orange 

Alternately add the tea blend and the dry ingredients to the honey blend. Mix well. Add the nuts and dried fruit and the orange juice. 

Place in a a round spinrgform pan lined with a baking sheet (or in a large rectangle pan) and bake for about an hour or until a toothpick inserted into the cake comes out clean. Keeps well but if you don't think you can eat it within a week, keep it refrigerated. 

Labels: , , , , , ,

Saturday, July 28, 2018

Raspberry Streusel Coffee Cake

Raspberries

Summer is here and the fruit is ripe - and gets overripe before there's time to completely enjoy it... So some has to become this cake, which is one of my favourite cakes ever... It's the second week in a row that I'm making it and we have no trouble finishing it up - and thankful whenever there is a guest over to help us out!

It's super simple to make, and the best part - it smells so beautiful when it bakes - nothing quite like pastries baking when they have loads of almonds, butter and vanilla in them!

Streusel:
100g Melted butter 
1/4 cup sugar
1 cup flour 

Prepare the streusel by mixing together the dry ingredients, then pouring the melted butter on top. If the mixture is too moist, add more flour until crumbs have formed. Refrigerate and proceed with making the cake

For the cake: 
10 Tbs. salted butter, room temperature
2/3 Cup sugar
1 tsp. pure vanilla extract or 1 tsp. vanilla paste
1 tsp. pure vanilla extract
Zest from 1 lemon
3 eggs
2 cup unbleached white flour
250-300g raspberries, fresh or frozen, tossed with 2 Tbs flour 
2 tsp. double acting baking powder, or 1 package baking powder 
1/4 cup buttermilk or sour milk 

• Use an 11 inch springform pan, lined with parchment paper.
• Cream the butter with the sugar, vanilla and almond extracts.
• Beat in eggs, one at a time.
• Sift the flour with the baking powder Beat into the egg mixture. Add the buttermilk and mix well.
• Toss in the dusted raspberries (flouring them first ensures that they won't sink to the bottom; if using frozen ones, let them thaw a little bit before adding the flour, so that it actually sticks to their outsides and covers them).
• Spread the batter into the baking pan.
• Bake at 350°F for 30-40 minutes, or until a knife or toothpick inserted in the middle comes out pretty clean (as long as you don’t insert it through the fruit!)
• While the cake is baking, prepare the Raspberry Sauce. 

For the raspberry sauce:
250g raspberries
160g powdered sugar
2 Tbs Créme de Cassis liquor 
Juice from 1 lemon (about 2Tbs)
Blitz in a food processor until smooth. Keep refrigerated.

To serve:
This raspberry torte is best served on the day of or the next day at the most (if it will last at all!). Serve it warm with a scoop of vanilla ice cream and drizzle the raspberry sauce all over it.
Or, serve at room temperature with a  dollop of whipped cream and drizzle with the raspberry sauce as well.

Raspberry Coffee Cake

Labels: , , , , ,

Friday, October 06, 2017

Etrog Icebox Shortbread Cookies

Etrog (Citron)

Ingredients:
    125 g (1/2 cup AKA 1 stick) unsalted butter, room temperature
    1/2 cup confectioners' sugar
    1/2 teaspoon vanilla extract
    1/4 teaspoon salt
    1/2 cups all-purpose flour, plus as much as needed for rolling
    1/2 cups rice flour or tapioca starch 
    Zest from one etrog (citron), or Meyer lemon, or dried yuzu (Japanese citron). Or: mix in 1/4 cup of candied citron peel

Instructions: 
- Using your tool of choice (fork, wire whisk or an electric mixer) beat tougher the butter, sugar, vanilla, and salt until smooth.
- With mixer on low speed, add flour, mixing just until a dough forms. Stir in desired mix-ins.
- Divide dough in half; wrap with a plastic wrap and gently roll each into a 1 1/2-inch-diameter log. Place in the freezer for at least one hour (or store up to several months so that you can just slice and bake a few cookies on demand whenever unexpected company is coming)
- Preheat oven to 350 degrees.
- Unwrap logs, and using a French knife, slice dough 3/8 inch thick (if dough crumbles, leave at room temperature 5 to 10 minutes). Arrange slices, about 1 inch apart, on baking sheets.
- Bake until lightly golden around the edges, about 15 to 20 minutes.
- Cool on baking sheets 1 to 2 minutes; transfer to a wire rack to cool completely.


Labels: , , , ,

Thursday, October 05, 2017

Moroccan Eggplant Confiture

Moroccan Eggplant Confiture
If you didn't have a Moroccan grandmother, you probably won't be awash in a wave of nostalgia biting into the stem of one of these miniature candied eggplants. If you never tasted this Moroccan specialty, you'd be hard-pressed to figure out what it is made of. Both the size of the "fruit", its shape and the texture and flavour make it very difficult to guess it's an eggplant. Perhaps a pear would come to mind. 

mini eggplants
Photo by Think Draw on Flickr

But I assure you that they do make a very impressive addition to any big celebration, and there are many ways to serve and eat them. But the best way is to grab them by the tail (or edible lollipop handle), and consume them from their firm but soft, seedy, sugared and spiced bottoms and nibble till you reach the firm top under the calyx, threaten to snap the candied stem, but manage only to scrape off the candied parts off the woody skeleton of the stem.  

Eating as it is will always warrant a sense of importance and feeling like this is a moment to cherish. First of all, because tiny eggplants are not something one often runs into. And secondly, a person who's patient enough to shape the calyx of each individual eggplant, pierce it with a fork and then go through the lengthy cooking process is not easy to come by either. They usually come with the title "grandmother", who would only make it for special occasions such as wedding, bar mitzvah or brith; or in my case - you just needs to be an obsessed person with reviving nostalgia. 

But you can also reserve the syrup for dripping over pancakes and French toast, slice the mini eggplants on top of fancy dessert arrangements or a fancy sweet and savoury sandwich, or simply over cheese and crackers. I admit that the best is just eat as it is with a cup of tea on the side to wash down all the sugar. 

The Making of Moroccan Eggplant Confiture

So if you stumble upon miniature eggplants, be sure to buy a kilo of the smallest and finest ones, no blemishes or parts that show any sign of rotting in the near future. Wash them and cut around the base of to stem, to remove any excess parts of the calyx (the green leafy looking part). Pierce with a fork. Once all are ready place in a pot of filtered water and cook until water boils. Reduce heat and simmer for five minutes. Allow the eggplants to cool before draining completely in a colander. 

Meanwhile while the eggplants are cooling, squeeze enough lemons to make half a cup of lemon juice. Bring to a boil one kilogram of sugar (I use raw cane sugar - not any sugar containing molasses) together with the lemon juice, and add all the spices: cinnamon, cloves and ginger. Once the mixture comes to a boil and the sugar has completely melted - add the eggplants. Cook until the eggplants have absorbed about half o the syrup (takes between 1-2 hours). 

Ingredients list:
1 kg miniature eggplants
1 kg sugar
1/2 cup lemon juice
2 sticks cinnamon, Ceylon
1 tsp clove buds
2 tsp cinnamon, ground
2tsp cloves, ground 
2 tsp dried ginger root, ground 


Labels: , , , , , , , , ,

Monday, August 17, 2015

Lavender Deodorant

Lavender Deodorant

Making your own deodorant is easier than a pie. And as skeptic as I may have been - it's also results in a very effective product. I tried this one when teaching two back-to-pack Pilates classes, and was absolutely sure my armpits will overcome the superficial layer of essential oils. But I was proven wrong. I use this now all the time, and am almost out of the 4 little jars I made; so figure once I dig out my recipe, why not share it on SmellyBlog?

It's especially relevant now, because: a) it's summer; b) it's a hot summer; and c) lavender, who is getting plenty of attention this month on SmellyBlog, is one of the best natural deodorants out there!

But lavender is not the only essential oil that will help your armpits smell nice and fresh throughout the dog days of summer; here's a list of oils that can be used individually - or better yet, synergistically. When you combine two or more oils that have the same properties, not only will they smell nice; their action and effectiveness will also be amplified.

Deodorizing oils:
Allspice
Basil
Bay Leaf
Calendula
Clary Sage
Coriander
Cypress
Eucalyptus
Frankincense
Grapefruit
Jasmine
Hops
Lavender
Lemon
Lime
Lovage
Myrrh
Patchouli
Peppermint
Rosemary
Sage
Sandalwood
Orange, Sweet
Tea Tree Oil
Vetiver

The following recipe is for a cream deodorant - you will need to use your finger to apply it. It's a bit awkward if you're used to stick deodorants, but totally worth it if you've nailed down a scent that you really love, not to mention it works really well and costs very little compared to the fancy deodorants you'll find in the health food stores (some of which are not only expensive, but also rather useless).

The key active ingredients here are the baking soda and the oils. Baking soda absorbs odours and will keep the armpit scent away. The essential oils neutralize the activity of bacteria (they are most antiseptic oils, so they stop the action of the bacteria that produces armpit sweat odour). The starch's role is to absorb the sweat and also it helps with the consistency of the cream, making it less runny (which is particularly an issue on hot summer days - which is when you need your deodorant the most!).
The coconut oil is non-comedogenic, and its role is to carry all the active ingredients. The butter's role is to bring it to a more solid state at room temperature. I'm still experimenting with other butters and waxes to formulate a stick-deodorant and researching what to put in a spray deodorant. As you can tell, I'm my lab' most eager test bunny.

Lovender deodorant

DIY Deodorant 
3 Tbs virgin coconut oil
2 Tbs shea butter or cocoa butter 
3 Tbs baking powder 
2 Tbs powdered starch (I used arrowroot in lieu of corn starch) 
25-50 gtts (drops) of lavender oil, or any combination of deodorizing essential oils of your choice (see list above), or use the following combination, which totals 50 drops:

"No Sweat" - Ayala's Deodorant Scent:
20 gtts lavender essential oil
10 gtts geranium essential oil
2 gtts myrrh essential oil
5 gtts patchouli essential oil 
3 gtts vetiver essential oil

Directions: 
- Measure the oil and butter, and warm up gently over a bain-marie, until just melted.
- Remove from the heat
- Stir in the baking soda and starch, until completely incorporated
- Add the essential oils drop by drop, stirring well between additions
- Pour into clean, sterilized jars, and close the lid
- Refrigerate until set (this is especially important in the summer - otherwise you'll end up with a runny paste that never quite settles down).

Labels: , , , , ,

Sunday, August 16, 2015

Lavender-Violet-Cassis Cupcakes

Lavender, Blueberry & Violet Cupcakes

Lavender-Violet-Cassis Cupcakes were an invention of a moment a few summers ago that got a hold in my baking repertoire as an exotic yet easy to whip-up pastry that looks pretty and impressive. The decoration is so simple: flowering tops of lavender (preferably fresh), and crystallized violets. Both are fancy, yet keep for a long time and create a memorable impression, both visually and on your guests palate. I've served them since in bridal stagettes and baby showers, and always got many complements!

If you can't get a hold of black currants (cassis), blueberries make a fine and delicious substitute. Keep in mind that the smaller the berries - the more flavourful they are, as most of the flavour is actually in their skin. The violet glazing is not what's going to make or break this recipe, so use it only if you have it - so if you can't find it, don't let that stop you from baking and enjoying these cupcakes .

Batter:
½ cup sugar
¼ tsp. dried lavender buds
1 stick butter at room temperature
2 eggs
1 cup flour
1-1/2 tsp. baking powder
2 Tbs. milk
1 Tbs Créme de Cassis liquor
½ cup fresh or frozen blackcurrants (or blueberries, if you can’t find blackcurrants)

Glazing:
Violet jelly (optional)

Icing:
5oz cream cheese
2/3 cup icing sugar
½ tsp vanilla extract or vanilla paste

For decoration:
Lavender springs and/or Candied Violet Petals

- Preheat the oven to 350F (180c)
- Make the batter by creaming together the butter, sugar and lavender buds.
- Add the eggs, one at a time, until fully incorporated.
- Sift together flour and baking powder, and add to the batter.
- Add the milk and liquor
- Add the berries, and stir gently just until incorporated (avoid bruising the berries!)
- Bake in paper-lined muffin tins for 20 minutes, or until a toothpick inserted in the centre of the middle cupcake comes out clean.
- Place the cupcakes and wait till they have cooled completely
- Meanwhile (as they are baking and cooling), whip up the cream cheese icing, blending all ingredients until smooth.
- To decorate, brush each cupcake with the violet jelly, once it's absorbed into the dough a little bit, place a generous dollop of the icing (or pipe it if you like it to be more precise-looking).
- Right before serving: Top each cupcake with one blooming top of lavender, and one candied violet petal.

Labels: , , , , , ,

Saturday, July 25, 2015

Apricot & Jasmine Tea Cake

Apricot Jasmine Tea Cake

Jasmine has a hint of a fruity, almost apricot-like aspect. So I felt inspired to try this combination, using infused jasmine tea leaves as a fragrant variation for my classic Apricot & Almond Torte, in which jasmine tea has been infused into the cake and also added to the top of the cake in the form of a drizzled icing.

10 Tbs. salted butter, room temperature
2/3 Cup sugar
1/4 tsp. Haitian vanilla extract
3 eggs
1 cup unbleached white flour
1 cup almond meal (100gr)
2 tsp. double acting baking powder, or 1 package German Backpulver
1/2 cup STRONG jasmine tea, at room temperature (see more on that below)
1 Tbs finely chopped, infused (wet) jasmine tea leaves
About a dozen fresh apricots – or enough of them to cover the cake’s surface

For the icing:
3 Tbs icing sugar, sifted
1 Tbs strong jasmine tea at room temperature
A few drops of freshly squeezed lemon juice

Preparation:

• To prepare the jasmine tea, infuse 1 cup of water at 175F with 1Tbs of fine and fragrant green jasmine tea or dragon pearls. Infuse for no more than 2-3min to avoid it becoming too bitter, and reserve the brewed tea leaves to add to the cake later, and also for serving more with the cake once its baked!
• Use an 11 inch springform pan, lined with parchment paper.
• Cream the butter with the sugar and vanilla extract.
• Beat in eggs, one at a time.
• Sift the flour with the baking powder Beat into the egg mixture. Add the buttermilk and mix well.
• Add the chopped-up, infused jasmine tea leaves
• Spread the batter into the baking pan.
• Place the apricots on top, slightly overlapping, with the cut side facing UP.
• Bake at 350°F for 30-40 minutes, or until a knife inserted in the middle comes out pretty clean (as long as you don’t insert it through the fruit!)
• Prepare the icing by stirring all the ingredients with a fork or a mini wire whisk
• Once the cake cooled down, drizzle with the jasmine tea icing, and scatter a some whole, infused jasmine tea leaves for decoration on the top.
• Keeps well for a 2-3 days (if it lasts!). If you refrigerate, bring to room temperature before serving.

Apricot & Jasmine Tea Cake #Jasmine #Apricot


Labels: , , ,

Friday, July 24, 2015

Brewing Jasmine

Jasmine Tea

We had jasmine bushes growing in abundance in my village - almost in every household's garden. Even my frugal family - which had a strict policy about growing only useful things such as vegetables, medicinal herbs and and fruit trees - had one growing at our courtyard in front of the house. The poor little bush would release its intoxicating aroma even when it looked rather miserable. It never seems to give up on flowering, at any given season,  And at one point I was tempted to make a cup of homemade jasmine tea, simply by letting a single flower float on top of my cup of boiled water. It smelled like heaven, tasted as bitter as death, and left my tongue numb!

The technique of perfuming tea with flowers is an ancient art that was invented in China. During the Han Dynasty (206 BC - 220 AD), J. sambac from Persia arrived in China. By the 5th Centruy, teas were already perfumed with jasmine flowers. But it wasn't until the Qing Dynasty (1644-1912) that jasmine tea because popular the world over due to its introduction to the West.

By nature's own divine wisdom, tea gardens fortunately grow in close proximity to where some fragrant flowers can also thrive. All shades of tea can be perfumed with jasmine, including silver needle, red tea and oolong - but the most popular of them is jasmine green tea.

The technique of perfuming tea was originally developed to enhance the aroma of lower quality leaf, but because of demand and growing appreciation for this particular flavour, there are now many different grades, forms and qualities available, especially for jasmine tea.

Jasmine Pearls

Green jasmine tea is mostly produced in Fujian province in China, and is harvested in September - the prime time for jasmine sambac flowers in the region. The tea leaves and flowers are harvested at dawn. The tea goes a partial process, up to the stage of "fixing" by heat. While the tea leaves are still humid they are layered alternately to form an inch-thick carpet with fresh jasmine flowers. These flowers are left there for about 24 hours so that the tea leaves can absorb their perfume. The tea leaves are then heated for an hour to set the fragrance in, and the flowers are then removed before they begin to decompose so that the scent does not deteriorate. This same process will be repeated with a new batch of flowers, between 2-6 times. Between 30-50 kg of flowers are required to perfume 100 kg of undried tea leaves.

The flowers themselves have a bitter taste when brewed, which is why they are removed. You'll rarely find a jasmine blossom in a high quality jasmine tea. Poor quality and aromatized teas will have plenty of those, as if to convince the naive buyer that they are the real deal. Originally, the process of perfuming teas was created to improve the taste and aroma of medium quality teas. It was only later on that mediocre or worse quality teas were aromatized - in other words, sprayed with a manmade flavouring to enhance their taste and mask their poor quality. Sometimes these are easy to recognize because they have some dried jasmine flowers added later on for decoration and marketing purposes.

IMG_4840

Jasmine tea is recommended for pairing with coconut desserts, and in general all mildly sweetened Asian desserts go fantastically well with it, which is possibly why you'll be served a pot of jasmine tea as soon as you sit down for dim-sum. It is also served to accompany the pho - the deliciously light Vietnamese noodle soups, where the jasmine's aroma beautifully complements the fresh cilantro and basil leaves. Jasmine Tea Mooncakes (pictured above) are a traditional food of the Mid-Autumn Festival celebrated in mainland China, Taiwan, Vietnam and among Chinese communities the world over. It's a pastry that is filled a paste or a cream made of taro root or lotus-seed or a variety of other modern interpretations, to which other flavours (such as tea, fruits, nuts, and more recently also coffee and chocolate) can be added.

black dragon pearl tea

For Jade Jasmine Pearls, the choicest tea leaf is selected: a tiny twig with the entire bud and two leaves (similar to Bai Mu Dan, AKA White Peony), which are impregnated with jasmine's perfume and rolled into a pearl-sized ball.

Jasmine Silver Needle is a fine white tea in which the tender leaves are picked when they are still closed. They look like a needle, and their silvery fuzz in clear sight, which explains their name. In the brewing process, these tiny silver hairs separate form the leaves and float to the top of the cup, creating a beautiful light-reflecting shimmer that adds to the visual enjoyment of the tea. Some flowers may be found in these teas, but this is from a different variety that is not as bitter.

Jasmine Green Tea is the most popular, and the one that you will most likely find in an adulterated form. Watch out for tea blends that have many blossoms in them - these usually serve only a decorative purpose (most jasmine flowers do not retain their aroma after drying), and are a visual clue that the tea is, in fact, aromatized.

Black Dragon Pearls

Jasmine Black Tea is rare, and usually scented with a unique, fragrant variety of yellow jasmine, Jasminum odoratissimum is a Madeira (Portugal) variety but due to its quality of retaining its fragrance after drying, it is also grown in Formosa (Taiwan) where it is used to perfume tea. I've only encountered black jasmine tea in the form of hand-tied teas.

jasmine tea ball

Hand-Tied Teas come in a variety of flavours, colours and designs that open up only after the "tea bud" is steeped in water for a while. The flower unfolds like a slow-motion time-lapse of a blooming bud. For best visual effect, use a clear glass teapot to brew this tea. They can be re-steeped many times, provided they are fresh.

Jasmine Beer: I've had the pleasure to experience a Jasmine IPA (Indian Pale Ale) from Steamworks, a local craft brewery located near the Waterfront Station in Gastown. It is hoppy in the most refreshing, fruity-bitter manner, which only accentuates the subtle jasmine tea notes that are hidden within. I see that there are many other jasmine IPAs produced by craft breweries. But if you can't get your paws on one, you can brew your own Jasmine Kombucha (see recipe below).

Jasmine Kombucha: When I learned that you could, in fact, used flavoured teas for kombucha brewing, I thought that my mind was going to explode from happiness (and ideas). Sometimes the best things are the simplest ones. Taking a fine ingredient, and making it even finer by a traditional, tried-and-true process. The key here is to have a good, healthy kombucha, and use the finest jasmine tea you can get. Another important component of a successful flavoured kombucha-making is that if you are using flavours, only to make them occasionally. The oils in flavoured teas do not add to the health of the culture. So you must alternate between making flavoured ones to plain ones. Follow the recipe for kombucha provided on this blog, using high quality jasmine-scented tea. You may also use flowering (hand-tied) teas, though this may be a bit of a waste of a beautiful thing (visually speaking).


Labels: , , , , ,

Kombucha Recipe

Kombucha in Japanese means "Mushroom Tea". It is a fermented tea beverage that is considered healthful and nutritious in the macrobiotic diet, combining the benefits of tea (antioxidants) and the symbiotic culture of fungi and bacteria that's in the kombucha starter, AKA SCOBY - a weird, jellyfish looking disk that takes the shape of the surface of jar it was last brewed on, and which feeds on sugar and theine (the caffeine which is present in tea). It also has become a lifestyle trademark of Hipsters the world over. Thankfully, it is also delicious and you do not need to be a Hipster to enjoy it. It is also an excellent substitute to more damaging alcoholic drinks, although I should worn you that when fermented for a very long time, kombucha may develop a small amount of alcohol. If you're very sensitive to alcohol, you may be advised against drinking kombucha while driving. How can you tell if your kombucha has alcohol content? You'll start feeling a tiny bit lightheaded, and probably feel like you should get off the road. In other words: your judgement would never be impaired to the point of thinking you're an excellent driver while under the kombucha influence. We're talking about 0.5% alcohol at the most... Although I hear black teas can turn kombucha into a little higher. In which case, you might not want to serve it in a baby-bottle to your toddler. So if your little one gets drowsy after their afternoon kombucha infusion, this may be a sign that the alcohol content have exceeded the caffein levels in your brew. Wait, are babies even allowed caffein?!

But I digress with my ridiculous (and often misunderstood) jokes. You probably want me to tell you already how to make kombucha and custom-flavour it. So before we start, I want to refer you to an excellent video by CutlruesForHealth. It really is a great way to learn about how to make kombucha. They also have an excellent FAQ section.

Important Tip: ALWAYS sterilize ALL your dishes, tools and containers before preparing and bottling your kombucha! This is the number one reason for kombucha fail. Otherwise, it should be as simple as making an iced tea (and then forgetting about it for a week...). 

Ingredients:
2 liters of spring water or filtered water, boiled to the temperature required (i.e.: boiling water for black teas,  190 F for Oolongs, 185 F for white teas and 175 F for green teas).
Tip: Boil a little extra water for sterilizing all your tools and containers!
2 heaping tsp loose leaf tea
1/2 cup sugar (I use evaporated cane sugar - don't use any brown sugar or honey - these will change the acidity level and may spoil your kombucha and SCOBY)
1/4 cup kombucha from previous batch (or, if this is your first time making kombucha: use 1/4 cup of unpasteurized, unfiltered apple cider vinegar - preferably organic)
1 SCOBY (kombucha mother culture) - which you will have to get from a friend, or purchase dried online (follow instructions on the package on how to make this come to life!)

Tools and Equipment:
A 2 liter glass or ceramic pot large enough for your desired quantity
Kettle for warming and boiling the water for sterilization
Measuring cups and teaspoons
Tea strainer and/or medium sized fine mesh sieve
Coffee filter or clean cotton cloth for covering your kombucha container, and an elastic band to secure it to the jar
Funnel (optional: I use the spout of the measuring cup to bottle my kombucha)
Bottles or jars for bottling your kombucha
Tongs

Procedure:
Step 1: Sterilize with boiling water all your tools, dishes, jars and containers used to handle the SCOBY and ferment the kombucha

Step 2: Prepare your water and steep the tea

Step 3: Add the sugar to the tea, and wait until it is completely dissolved and the tea have cooled down to room temperature

Step 4: Add the pre-made (unlfavoured) kombucha from previous batch (or apple cider vinegar if this is your first time brewing kombucha)

Step 5: Add the SCOBY - I handle mine with a pair of sterilized tongs

Step 6: Cover the jar with the coffee filter or a cotton cloth that is breathable but still prevents dust and fruit flies from diving in.

Step 7: Place in a warm place for at least 7 days (I use the top of the fridge).

Step 8: Taste the kombucha after a week, and see if you like the taste of it. The more mature it is, the more sugars it will digest and transform - and therefore it will develop more of its fermented, acidic taste.

Step 9: Bottle the Kombucha into sterlized glass containers. Reused wine bottles and sling-top beer bottles are a good Hipstery-looking option, though a bit hard to fill (you'll need a funnel), not to mention clean. To make matters worse - if you throw the sling-top bottles in a dishwasher, their aluminum parts will oxidize - yikes!. I reuse tomato-juice bottles or any other glass juice bottles, and am also happy that I don't need to use a funnel to fill them (the spout of a measuring cup is perfect for this task). 

Step 10: Additional flavouring. At this point, if you haven't been using a flavoured tea and want your kombucha to taste like something else besides tea, you may add a little bit of fruit juice, sprigs of herbs, spices and whatnot. Added sugar from fruit juice or honey will continue the fermentation process and will also help to boost up the fizz in the next step! 

Step 11: To achieve the bubbly, soda or champagne-like fizz effect, you will need to continue with one more step: age the kombuch, with tightly closed lids, for 24-48hrs. 

Note about flavouring kombucha:
The key here is to have a good, healthy kombucha, and use the finest tea you can get. Another important component of a successful flavoured kombucha-making is that if you are using flavours, only to make them occasionally. The oils in flavoured teas do not add to the health of the culture. So you must alternate between making flavoured ones to plain ones.
Ideas for flavouring: Follow the recipe for kombucha provided on this blog, using high quality jasmine-scented tea. You may also use flowering (hand-tied) teas, though this may be a bit of a waste of a beautiful thing (visually speaking), and either white, green or black jasmine teas. They will take on the character of the tea leaf and the flavouring. To the jasmine tea you may want to add a tropical fruit juice, such as mango or guava.
I've also enjoyed immensely a Lavender Early Gray flavoured kombucha. 

Labels: , , , , , ,

Sunday, March 30, 2014

Wild Chicory


Wild chicory is unbearably bitter. But it's exactly what your liver needs in springtime, to cleanse and renew itself after the long winter struggle with reduced sunlight, and the body's tendency to go into hibernation mode (i.e.: storing fat, reducing circulation, and general stagnation). It is one of the many wild bitter herbs that pop up in early spring.

Chicory is a useful medicinal plants with several properties and uses. The leaves are mostly known for their cleansing and liver-protecting properties (either when eaten raw or cooked; or when dried and used in teas or other medicinal preparations). Leaves also can be used to redue skin inflammation and swelling.

The roots are often dried and roasted to prepare a coffee substitute, or are even added to coffee to extend its nutty flavour. It's interesting to note also, that chicory root also balances the stimulating properties of coffee.


Aside from the medicinal properties, chicory leaves provide a marvellous culinary experience for those who appreciate wildcrafted foods and the often neglected benefit of bitter flavour. Fresh leaves may be added to salads (use only the tender young leaves). Larger leaves may be steamed or sauteed and prepared similarly to kale, as a warm salad drizzled with olive oil, lemon juice and sea salt. You may feel the need to balance the bitterness with a little sweet touch of Silan (date molasses), honey or coconut palm sugar, or a handful of chopped almonds and raisins.

The Arabic cuisine in the Galilee includes a fascinating pastry, in which simple flatbread layered with with a mixture of steamed chicory leaves (known as "Elt") are seasoned with red chili pepper, salt and fried onion. The dough is than rolled and baked, and served along with other mezze and dips, or as a side dish with more hearty dishes such as mujadarah or lamb stew.

Note: Cultivated types or relatives of chicory include radiccio (also extremely bitter) and endive, which is grown in the dark to keep the leaves pale and tender (and also a little less bitter).

Labels: , , ,

Wednesday, March 05, 2014

In Praise of Stinging Nettles

Stinging Nettle by Glover747
Stinging Nettle, a photo by Glover747 on Flickr.
Stinging Nettles are a magical herb. This hardy little plant grows almost everywhere - in the wild, or amidst urban decay, providing those who know its secrets with a the best of wealth: health.

In the Northern Hemisphere it will arrive during the winter or early spring, just when it's needed for its many health benefits. First of all, in a season devoid of greens* nettles provide iron which is much needed to keep our red blood cells count, and keep us strong and energetic. Tea brewed from stinging nettles (fresh or dried) also help in many other aspects, such as cleansing the urinary tract, and combating inflammation. And the best part? It gives your immune system a boost against hay fever, which is everyone's least favourite part of spring!

If stinging nettles scare you, here's the trick: once you blanch them in boiled water, they immediately lose their sting! Of course that does not solve the problem of picking them (use gardener's gloves, unless you are blessed with rough worker's hands or have developed and immunity to the stinging venom in the leaves - something that most regular pickers of nettles develop after repeated exposure). Secondly, if you get them in the farmer's market, you just need to be careful to not touch them until after you blanch them - just pour them into boiling water, like pasta, and wait till they change colour into a dark green and look limp.

If the health benefits alone don't appeal to you all that much, here are a couple of delicious tips recipes using nettles, for any meal of the day:

1) Soup Broth: If you haven't developed a taste for the steeped nettles, you can use the hot tisane in addition to the broth of any soup.
2) Smoothie: The chilled tisane can be used as a liquid in smoothies. Try it with pineapple and kiwi!
3) Fritatta: Chop up a handful of the blanched nettle leaves, and add to 3 whisked eggs. Chop up one scallion, a handful of cilantro leaves, and add a dash of dried chili pepper flakes and 1/4tsp each of turmeric and cumin, and salt to taste.
4) Lentil & Chickpea Soup: In a saucepan, sautee onions, once golden add garlic, sautee for 10 more seconds and add 1Tbs of each cumin and coriander seeds. Sautee for additional 10-20 seconds. Add 6 liters of water and 1 cup each green and red lentils, and 1-2 tsp salt. Cook until the lentils have soften, and add pre-cooked chickpeas (or canned ones). Add chopped up bunch of blanched nettles and chopped fresh cilantro leaves. Serve with lemon juice.

*Go to the local farmer's market to see how little there is of fresh green leaves in the long-nighted months: even kale is quite miserable come February and March).

Labels: , , , , ,

Monday, February 10, 2014

Happy Family Day! + Overnight Bread Pudding Recipe

Bread Pudding by Ayala Moriel
Bread Pudding, a photo by Ayala Moriel on Flickr.
This is the 2nd Family Day in British Columbia - a statutory holiday that was invented last year, but sort of began 4 years ago, when the Vancouver School District slapped an extra Pro-D-Day (professional development day) on the closest day possible to Valentine's Day weekend.

This holiday being quite devoid of content so far, it's time to build it up a bit. For example: change legislation about how many parents can go on one baby's birth certificate. I wish I could have had a choice in the matter when my then-husband (and daughter's father) took off, conveniently close to when her diagnosis process began... Oh well. Being over 16 and all, she no longer needs a single consent from her faux-father even if he was around. Time flies! The only people who really count are not those on paper, but those who are there to parent the child, when they get their fever high up, get all their front teeth pulled out, break their femur, and the daily communication with a non-verbal little person that only got a grip on language at the age of 8. I thank the daddy that did step into the picture and decided to remain there to support us even when our romantic partnership has ceased to exist.

The weather today certainly helps in creating new traditions: constant rain after several weeks of rather dry (albeit chilly) weather. Perfect time for indoor fun such as blogging, playing card games, and baking.

For those of you into baking, here's the best bread pudding recipe, which makes a perfect use of any left over white bread, challah or brioche you may have (being a small family of 2, we never manage to finish our Friday night Challah, and always have at least half left - which I freeze and collect until I feel like bread pudding again).

I learned the recipe from my dear grandmother, when I first moved out of my parent's home, and she was my baking mentors for the entire time I lived in Tel Aviv. I owe her more than I can even begin to tell you - and the baking skills only scrape the surface! She turned 90 at the end of last year, and is now the proud grandmother of 6, and great-grandmother of 6 (well, soon 7!). She's truly the rock and foundation, who held the family together for many years, as my grandfather passed away many years ago.

I wrote down all the staple recipes for her pastries which I love - cheesecake with pudding creme, poppyseed chiffon cake with chocolate icing, date cake, honey cake, and many more. Years later, my mom bought a book about Ashkenazi Jewish recipes, which featured a very similar recipe, but with a slightly different baking method: the pudding is baked, covered in foil, under very low temperatures, overnight. Put it in the oven the night before, and you won't need an alarm clock: you'll wake up to the sweet smell of cinnamon and apples baking in the oven... Surely a wonderful way to wake up in the weekend as well, straight into a pampering brunch that needs no additional preparations!

I made a couple of adaptations from Shmulik Cohen's HaMitbach HaYehudi, such as the addition of steam to the baking process, which prevents it from scorching on the bottom. So I feel like I can call this recipe my own now:

Overnight Bread Pudding
1 Challah Bread
1 Cups milk and/or sweet red wine for soaking
4 Granny Smith apples
100gr raisins
1/4 cup brown sugar
3 Tbs Povidl (spiced plum jam) aka Pflaumenmousse
3 Eggs
1 Tbs cinnamon powder
1 Tbs pure vanilla extract
50gr butter, softened
- Hand-tear the bread into small pieces
- Wet the bread with milk or wine, and squeeze out any excess moisture
- Peel, core and grate or chop the apples (grating creates a more consistent texture; while using chopped apples creates a texture more similar to an apple cake - it truly is a personal choice)
- Butter a 23x27cm pan
- Fill with the batter and flatten the top with a spoon or a spatula
- Use an aluminum foil for covering
- Place the pan inside another pan that is filled with tap water
- Bake overnight at 100c (or at least for 8hrs)
- In the morning, remove the foil, springle with some more sugar and cinnamon, and dot with butter. Bake for another hour.
- Serve warm or at room temperature. There are many ways to enjoy this simple treat: It's wonderful on its own as a breakfast affair, or with a slice or two of sharp cheese such as Cheddar or Emmenthal. Alternatively, serve as a desert a-la-mod with a scoop of real vanilla ice cream. But that's a bit of an overkill in my opinion. My personal favourite is room temperature, with homemade chocolate milk on the side. 

Labels: , , , , ,

Tuesday, January 14, 2014

Malabi (Recipe)


Malabi by Ayala Moriel
Malabi, a photo by Ayala Moriel on Flickr.
Malabi is a Middle Eastern dessert, a milk pudding thickened by rice flour, which is usually served cold like Panna Cotta. Unfortunately, most of the malabi recipes, as well as what you'll find on street corners and even in restaurants are made with the inferior cornstarch, giving it (what I think is) an unpleasant aftertaste and a rubbery texture.

The dessert is made simply by cooking milk and starch as if to make a pudding. It is only minimally sweetened, if at all, and always must be flavoured with rosewater and orange flower water, which is the only thing that really sets it apart from the old fashioned baby-food that was served in the 1950's (when mothers were convinced that fattening a baby with modified starches is the way to prove that their kid is not malnourished). You may serve it warm; but the traditional recipe is for chilled malabi, which gives you room for many creative serving suggestions (i.e.: using moulds, fancy cups, garnishes, syrups and toppings).

This recipe is adapted from May S. Bsisu's excellent book "The Arab Table" (p. 322) and from Israeli Kitchen. Please note that malabi has many other names and spellings (i.e.: Mohalabia, Malabia, Muhallibieh, etc.). She also offers several regional variations on this dessert (for instance: whole green cardamoms and saffron strands are cooked with the pudding in Saudia Arabia), including the explanation about the Syrian and Lebanese version using rice flour instead of corn starch, which is my personal preference. Note: if you want a more gooey, jelly like consistency, use Sweet Rice flour, aka glutinous rice, which is easily obtained in Asian grocery stores. For a more wholesome variation (which is great especially if served warm) use brown rice flour. Note regarding the mastic: this resin adds to both the flavour and the texture of the dessert, making it more gooey, but also making the flavour a bit different (and it is an acquired taste). 

8 Tablespoons Rice Flour, whisk and dissolve in 1/3 cup of water.
4 tsp sugar
1 L whole milk
1 Tbs rosewater
1 Tbs orange flower water
Pinch of mastic resin (optional).

For the garnish:
Date honey (also called molasses), Pomegranate molasses, grenadine, rose syrup or rose petal jam.
Toasted, crushed, unshelled and blanched pistachios or almonds; OR fresh pomegranate seeds; OR ground cinnamon and cardamom plus crushed nuts. 

 - In a small saucepan, begin heating the milk and sugar.
- Gradually add the rice flour and water and rice mixture, and cook over medium heat and simmer, stirring continuously in order to prevent lumps from forming.
- Add the mastic, if desired. 
- Once the mixture had thickened into a custard-like consistency (in about 5 minutes), add the rosewater and orange flower water. 
- Pour into small ramekins or dessert bowls, a bring to room temperature. Cover with a plastic warp and refrigerate for 2 hours. Serve with a garnish of nuts and your favourite syrup.
- Please note: These do not invert well (like panna cotta), but will have to be eaten out of the ramekins, similarly to a custard or a Crème brûlée. 

Labels: , , , , , , , , ,

Monday, October 14, 2013

Happy Thanksgiving!

Pumpkin Pie by Ayala Moriel
Pumpkin Pie, a photo by Ayala Moriel on Flickr.
Happy Thanksgiving to all of my fellow Canadians celebrating!
We've been fortunate with a glorious sunny autumn weekend, allowing us to breath in the crisp, sweetly scented fall air, gather inspiration in VanDusen Gardens, and drench our bones in some kayaking adventures in Deep Cove.
In the meantime, I invite you to try my pumpkin pie recipe, with an orange-lavender crust. FYI I used roasted fresh pumpkins for this pie in the picture - and it gives it a beautiful depth with hints of smokiness.

For the Orange-Lavender Shortbread Crust:

100gr (1 stick) butter
1 cup + 1 Tbs Whole Wheat Flour
2 Tbs Orange Juice
Rind from 1 orange
1 tsp fresh or dry lavender buds

2 Tbs Sugar

1/2 tsp. Vanilla Extract (Or use vanilla sugar instead of the sugar above)
- Using your fingers or a manual dough blender, mix together butter and flour inside the pie pan. Add the rest of the ingredients and knead just until a dough forms (avoid overworking the dough, as it would take away from its flakiness).
- Press the dough firmly onto the pan to spread it evenly and line the pie pan (including the sides of course!).

Pumpkin Custard Filling:

3 eggs
1-1/2 cup Cooked and pureed pumpkin (if you have fresh - all the better; if not - canned pumpkin is good too)
1 cup cream or hald&half (I prefer full cream)

2 Tbs Orange Juice
3/4 Cup Brown Sugar

2 Tbs grated fresh Ginger (I freeze my ginger and than it is really easy to grate it; the taste is incomparable to the dried ginger!)
1 tsp Cinnamon
1/4 tsp Cloves
1/4 tsp Allspice
1/4 tsp Nutmeg (freshly grated), or ground mace

Bake in 350 F (170-180 c) degrees for 40-60 minutes, until the filling is set.
Serve warm or cooled down to room temperature.

Serving suggestions: I like it best on it's own with milky cinnamon or chai tea on the side. But of course you can’t go wrong with the traditional a-la-mode (be sure to use real vanilla bean ice cream) or a dollop of freshly whipped cream or crème fraiche.
Pumpkin Pie

Pumpkin Pie

Pumpkin Pie

Pumpkin Pie


Pumpkin Pie

Labels: , , ,

Friday, October 11, 2013

Farm Friday

Farm Friday

Every Friday we go to Southlands for my daughter's therapeutic horseback riding lesson. It is part of a beautiful heritage farm, and there is always something to see, smell and sometimes even taste around there. There's a magic path around the orchard and the vegetable gardens, where chicken and lambs roam free among the old apple, pear, plum and quince trees.

Whenever I decided to leave my phone in the car, I regret it because I always find something along the way that I want to photograph and find inspiring. So I figured I'll try to start a little corner for the farm treasures I find every Friday, which is usually a very short day for me that needs to pack a punch - and usually find not time whatsoever for blogging.

Today I saw the quinces ripen on the tree and also purchased a pound from the farmer's stand at the barn. I decided to poach them in white wine, brandy, honey, lemon peel and juice, bay laef, cardamom, juniper berries and rose petals. As I type this, my house is filled with this aromatic melange of spices, herbs and fruit. And tomorrow these quinces will be served at my Thanksgiving dinner table as part of a quince and blue cheese salad.

Before I forget - here's the poaching recipe for this particular made-up poaching juice:
1 cup white wine
1.5 cups water
1 shot of gin
1 shot of grand marnier
2 shots of brandy
2 bay leaves
15 green peppercorns
6 juniper berries
5 rose buds (dried)
3 green cardamom pods, whole
Zest and juice of one lemon
1 Tbs honey
1/2 cup sugar
2-3 Quinces

Bring all ingredients to a boil, then add wedges of quince, and simmer for 30 minutes.


Labels: , , , ,

Thursday, September 26, 2013

Lemon Verbena Infusion

Lemon Verbena Cordial by Chiot's Run
Lemon Verbena Cordial, a photo by Chiot's Run on Flickr.
Cold infusion is a less-known method for creating iced teas, and has many advantages over the more common method of chilling tea or hot infusions. To start with, you won't need to spend nearly as much energy to heat and than cool your concoction. Second, and not any less important: some teas truly benefit from not being heated, as it can bring out the best qualities of fresh leaves that would otherwise be destroyed in the process of hot infusion.

Cold infusion requires more time to infuse, but that can be easily done overnight: fill a 1L jar or pitcher with 2-4 sprigs of rinsed, freshly picked lemon verbena (or spearmint, or 4 blades of lemongrass). Cover with spring water or tapwater (filtered if necessary), and let it sit overnight in the refrigerator. In the morning, you'll have a cool, refreshing beverage, which you could fill in your to-go bottle, while covering the herbs again with fresh water for a 2nd cold-infusion.

When cold-infusing fresh lemon verbena leaves, the result is a more grassy, green and delicate infusion. The citral is a little less dominant as well, giving more room for the more floral and green notes. Also, the result is a very clear water, which is most refreshing in the hot summer months. We drank lemon verbene, spearmint or lemongrass infused water all summer and they were thirst-quenching and provided little moments of sanity and a pure luxury while hydrating.

Making a hot infusion is wonderful too - and will bring out the bright yellow colour of lemon verbena. It will, however, require more planning ahead: You'll have to infuse the tea, bring it to room temperature, and than chill it for at least 4 hours, if not overnight (depending on how much power you have in your refrigerator: the one we had in the village was an ice-box size machine with very little cooling power, so everything had to be planned and thought-through well ahead).

I was first introduced to this method by my Canadian-Japanese friend Dean, who would make cold barley "tea" every summer (it's a simple infusion of roasted barley, that is very popular in Japan in the cooler months; you might be also able to find cans of this treat at the Japanese Konbiniya on Robson street - or your own local Japanese/Asian grocery store). Second time I learned about it was from Maria at Shaktea on Main: she recommended this method for making iced tea from their aromatized white and green teas (their Pomegranate & Magnolia was my first time experimenting with this method, and their Elderflower & Cantaloupe is even better this way). It might be a bit tricky with aromatized teas though: the aromas can taste a bit plastic-y and tongue-burning sometimes if they don't udnergo the heating. So you will just have to test and see for each tea if that method makes it better or worse than cooling a hot-infusion. Like the cold infusions of fresh leaves, dried tea infusions may be re-steeped a 2nd and even a 3rd time.

Labels: , , , ,